But huh? What do you mean by compiling your own Linux Kernel for Windows!? Well little friends, if you haven’t been in a cave in the last few months you’ve certainly heard that Microsoft will now distribute a Linux Kernel along with Windows.
Windows Subsystem for Linux 2 (WSL2), the WSL 1 updated, Microsoft’s “Wine” (for those who don’t know Wine is the project that tries to run windows applications on Linux 😝), now runs on top of a real Linux Kernel and gives you the possibility to load a customized Kernel inside Windows.
WSL and WSL 2 – Differences
WSL (Windows Subsystem for Linux) is a Microsoft project to natively run Linux applications, Linux distros on Windows without a virtual machine. The idea is, roughly speaking, to “translate” Linux syscalls into Windows syscalls. In other words, the application will use the native Windows NT kernel to run.
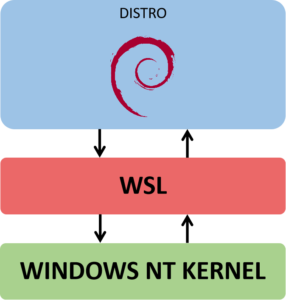
WSL works very well, we can run distros and Linux user space applications like Ubuntu and Debian with this technology. The problem here is the big work that the WSL team has to do this “translation” and support all the functionality between the systems, still making sure that it will behave as expected, not to mention that the Linux Kernel is almost like a living organism that is in active development and it is difficult for the WSL team to keep up with the latest updates.
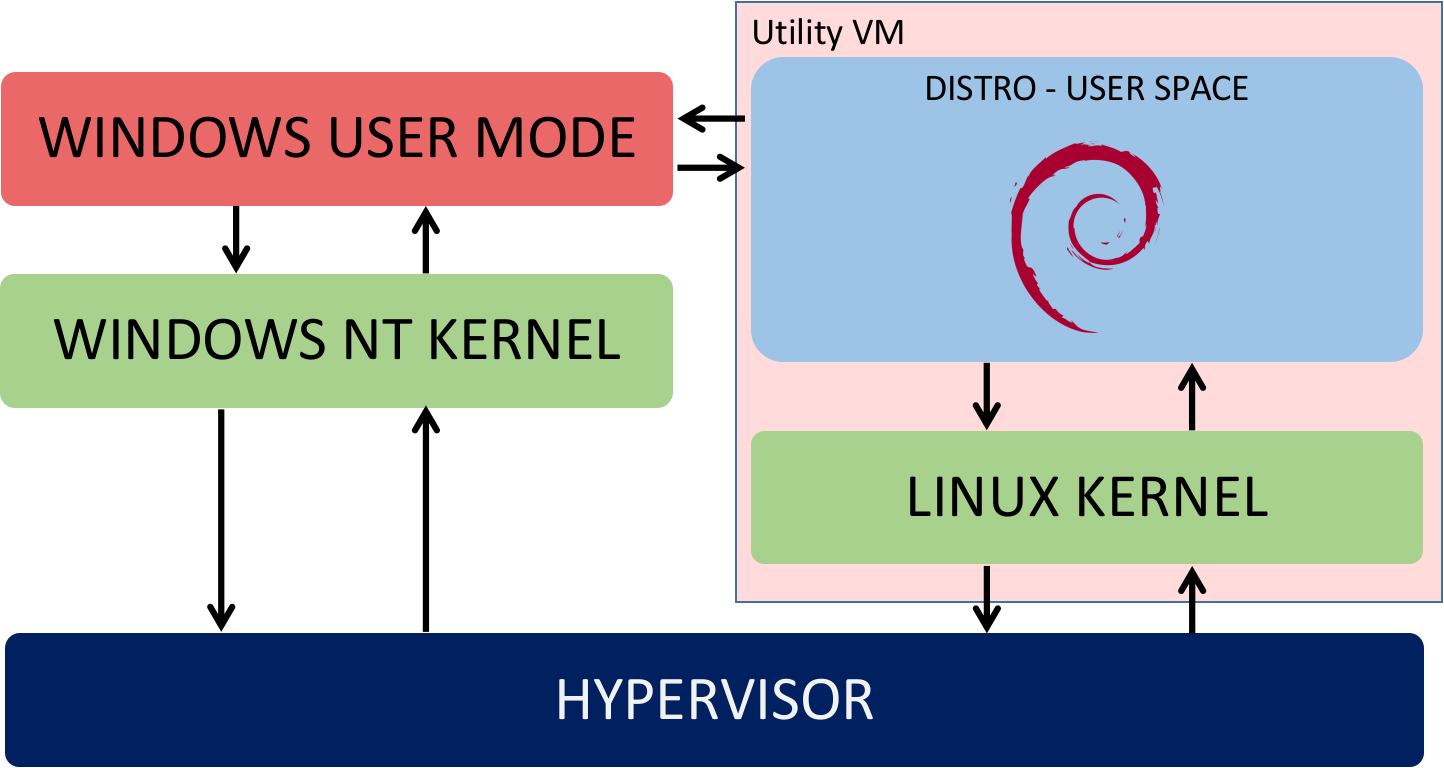
To solve this, and other problems, WSL 2 was proposed. The main idea is the same, running Linux applications, Linux distros on Windows. But now running natively on top of a virtualized Linux Kernel on a very lightweight utility Hyper-V VM. The Linux Kernel is open source, why spend time “translating” syscall if I can use it directly to run my applications?
So Microsoft compiles a tuned Linux kernel, customized and optimized to run on top of its Hyper-V with a very good performance, better than that delivered by the normal WSL.
Too bad the Wine folks don’t have the windows NT Kernel code to do the same … 🤔
Compiling your own Linux kernel for WSL 2
*The following steps were performed on Windows 189 build 18980.1, which you can download by participating in Windows Insiders.
WSL 2 not only loads a native Linux Kernel, the image of the Linux Kernel is in the directory C:\WINDOWS\System32\lxss\tools\kernel, but it also gives us the option of loading a customized Linux kernel. That’s right, we can compile and customize our own kernel to be loaded into WSL 2.
Standard Version – Longterm
The standard version that is delivered with build 18980.1 is the 4.19.67:
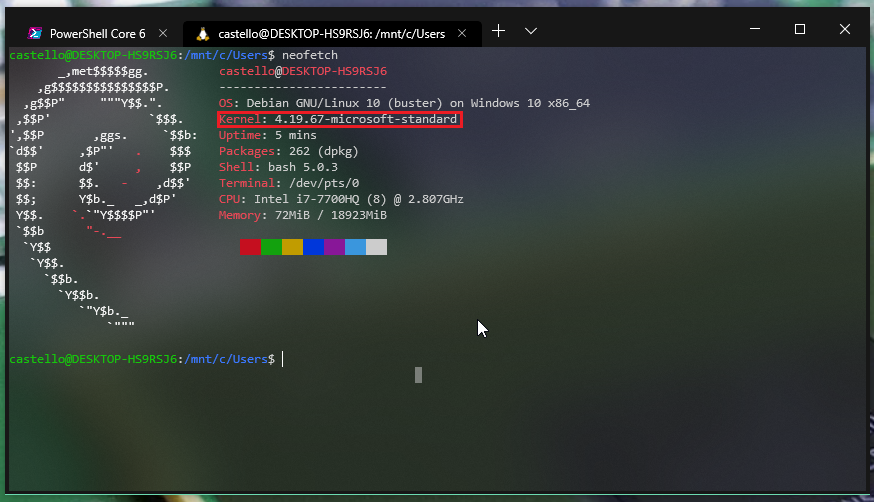
Microsoft, which is not silly, is using the latest longterm version of the Linux Kernel, v4.19. The source code for the Kernel used with WSL 2 is on Microsoft’s GitHub in the following repository: https://github.com/microsoft/WSL2-Linux-Kernel.
The code in this repository has some modifications, and tricks, to make the Kernel work optimally for Hyper-V. Checking the Makefile of this repository we can see that the team is already working with version 4.19.72, but longterm has already received updates and is at version 4.19.74.
So let’s not wait for Microsoft to send a Kernel update, we will compile it ourselves! (for fun, of course 😎)
Compiling your Kernel
Not only will we compile our custom kernel for WSL 2, but we will do it using WSL 2 itself 🤯. For this I merge directly from the Linux git tree stable with the WSL2-Linux-Kernel git tree that resulted in this branch: https://github.com/microhobby/linus-tree/tree/wsl_4.19.74
For compilation I am using the Debian distro and we will need the following packages:
With the dependencies installed we will clone the merge:
Before starting the game, let’s make a small change. In the standard Microsoft config, on line 22 we have the “LOCALVERSION” config:
This config adds a name to the release version of the compiled Kernel:

I will modify this config to the following:
All set, let’s compile our kernel with the following command:
This compilation should take about 10 minutes or more. Don’t forget to pass the “-j” argument at the end of the command, with the number of CPU cores that your machine has, so that the compilation takes place in parallel and speeds up the process a lot.
If all goes well at the end of the build we will have something like this:
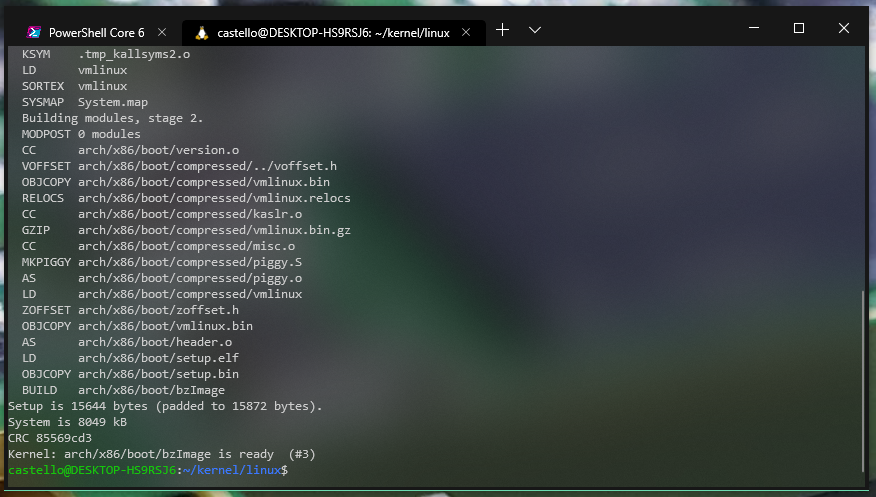
Loading your own Kernel on WSL 2
With the Kernel compiled we will have the following file in the source root:

This file is the “image”, raw binary of the Linux kernel and has the entire kernel and drivers built in. Let’s copy it to your user’s default windows folder:
Remember to change the <seuUser> to the name of your Windows user.
Now on Windows create a file called .wslconfig, also inside your user’s folder with the following content:
This file is the tricks of the trade. The WSL checks in it the kernel property which is the absolute path to the custom Kernel image that we want to load in Hyper-V, to use in conjunction with WSL 2. Again, remember to change the <seuUser> to the name of your Windows user. And it is important that this file is in the root of your user’s folder!
Now we’re almost there. To load the new Kernel we have to first turn off the distro that is running, and just close the window, or tab of the new terminal, does not solve. We have to open powershell and do the following:
Here I am sending “Debian” as an argument because it is the distro I am using, if you are using another distro modify this argument.
Now is the moment of truth. Open the Linux distro, if everything goes as expected, WSL 2 will see that we have a .wslconfig file in our user folder with a new Kernel, it will load the image we passed in Hyper-V and it will run our customized Kernel:
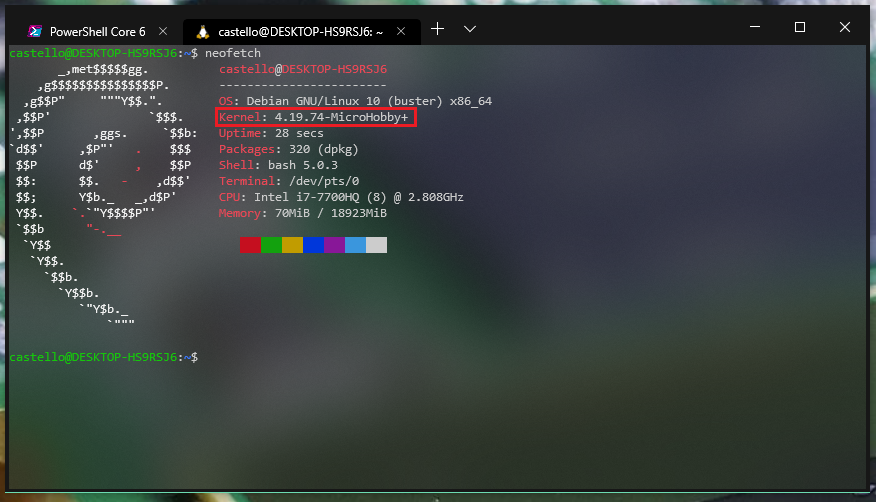
Done, now we are running the latest version, “MicroHobby”, stable longterm of the Linux Kernel on Windows through WSL 2.
Conclussions
This is a really cool extension feature in WSL 2 that adds a lot of possibilities to the developer. Being able to configure our own Kernel we are no longer stuck only with the modules and configs that are in the image of Microsoft’s standard Linux Kernel.
Youtube
Even if you prefer, I showed in practice the subject covered in this article in the video (sorry, portuguese content):